Understanding your Motorcycle Suspension
We had Séan Hendley find out as much as he could.
He came back with this – and it’s all mighty interesting!

With the constant evolving, advancing and progress in technology motorcycles are becoming ever more complicated – just to make it easier and get more riding pleasure out of our bikes. However, to actually understand and feel the benefits of all this progress we need to understand how it all works.
In this article we are going to look at suspension, which in reality is the biggest influence on how a bike handles and affects our riding style and enjoyment. Suspension is generally more complicated than the average D.I.Y. mechanics and track day enthusiast can maintain or set up themselves, yet it is such an important factor that it has led to a very lucrative sub-industry within the trade.
Motorcycle Suspension Explained
The primary goal of motorcycle suspension is to keep vehicle tyres in contact with the ground and to provide a comfortable, planted ride.
Without proper suspension, tyres would lose traction when encountering bumps, dips or other ground imperfections. We can’t forget about braking, acceleration or cornering forces either. Motorcycle suspensions use a spring and damper combination to isolate the chassis and rider from road imperfections. On-road motorcycle suspension systems work to minimise the effect of potholes, bumps, cornering and acceleration/deceleration forces. Off-road motorcycle suspension systems handle roots, rocks, jumps, ledges and more. Without suspension, any impact between a vehicle tyre and a ground imperfection is at best uncomfortable, and at worst, the cause of a dangerous crash. Most basic motorcycle suspension lacks adjustability. It works fairly well in a wide variety of circumstances, whereas more premium suspension is tuneable to rider weight and intended riding type. Cruisers or dual sport motorcycles have vastly different needs to a dedicated sport bike. Adjustability can include ride height (under load), fine tuning how quickly springs compress or rebound as well as preloading spring tension to accommodate differing weight for different riding styles, such as riding with a passenger and/or luggage. The most common suspension systems found on motorcycles use a coil spring and hydraulic damper setup. (credit – Universal Technical Institute www.uit.edu)
What does a spring do?
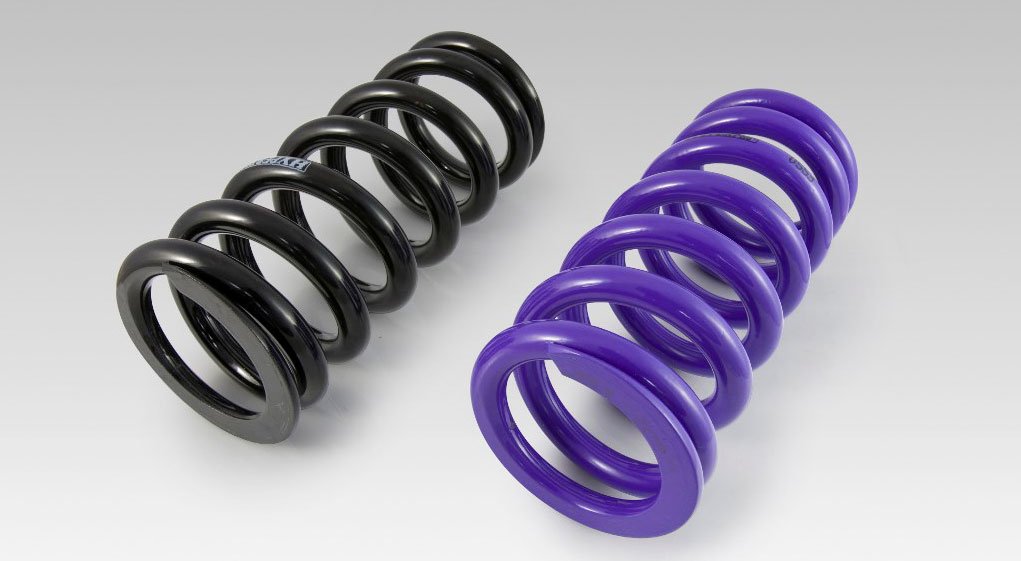
Springs allow a motorcycle wheel to move independently from the chassis, and dampers control and manage movement of the spring. A motorcycle riding only on springs would bounce continuously and dangerously after every road impact. Springs are coiled steel wire that compress or stretch when acted upon by an external force. Spring rate is the measurement of force required to compress it a certain distance, which is typically measured in pounds per inch. Spring rate varies with material thickness and number of coils. Heavier duty springs will have relatively thicker coils spaced further apart from one another. Linear rate springs offer consistent resistance throughout the spring travel. If 10 pounds will compress the spring one inch, 20 pounds would compress it two inches, and so on. Progressive springs require more and more force to achieve the same travel. Progressive springs are essentially two (or more) springs in one, with both widely and narrowly spaced coils. Initially, a lighter force will compress the first coils, and then greater force compresses the remaining coils. (credit – Universal Technical Institute www.uit.edu)

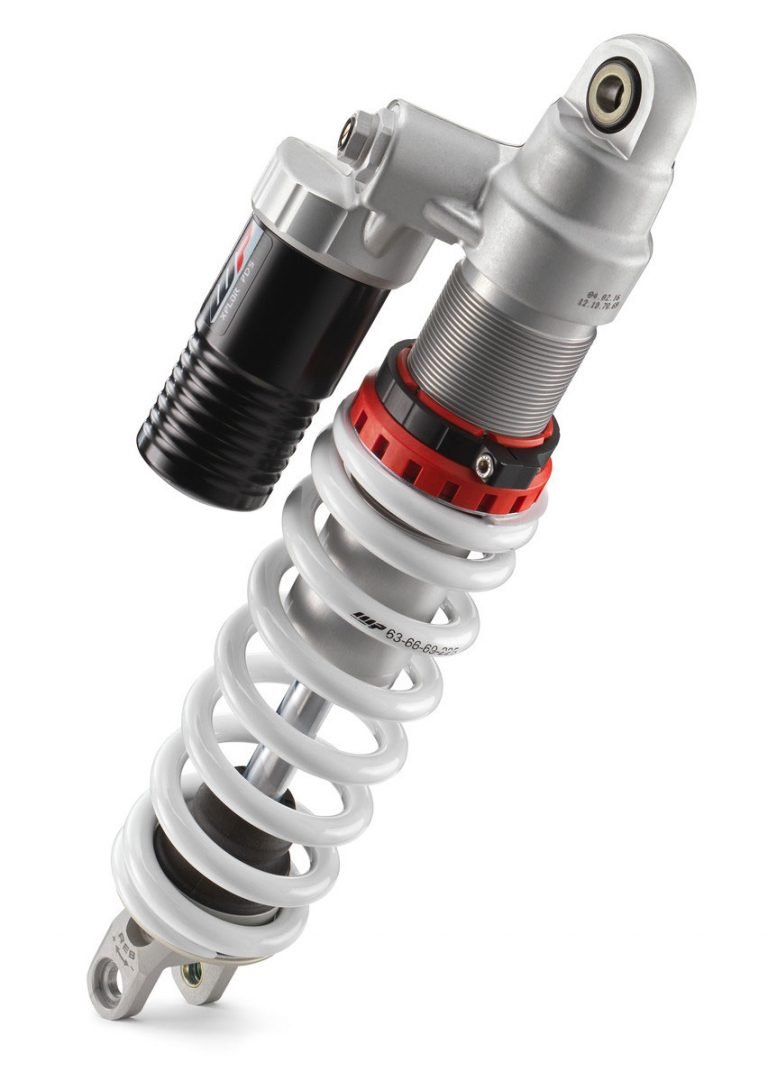
What does the damper (shock absorber) do?
In its most basic sense, a damper slows and controls spring action. Dampers control spring action using hydraulic fluid, which travels through a series of passages and restrictions. A piston with a precisely measured passage (orifice) travels within the shock body in a bath of hydraulic fluid. The weight of the fluid and the size of the passage determines the piston’s travel speed. When a motorcycle encounters a bump, dampers slow spring compression and rebound as the fluid slowly travels through the passages within the shock body. Kinetic energy from spring movement turns into heat energy within the damper, and the hydraulic fluid dissipates the heat. Rear motorcycle shocks generate much more heat than front forks, due to the additional loads they support. (credit – Universal Technical Institute www.uit.edu)
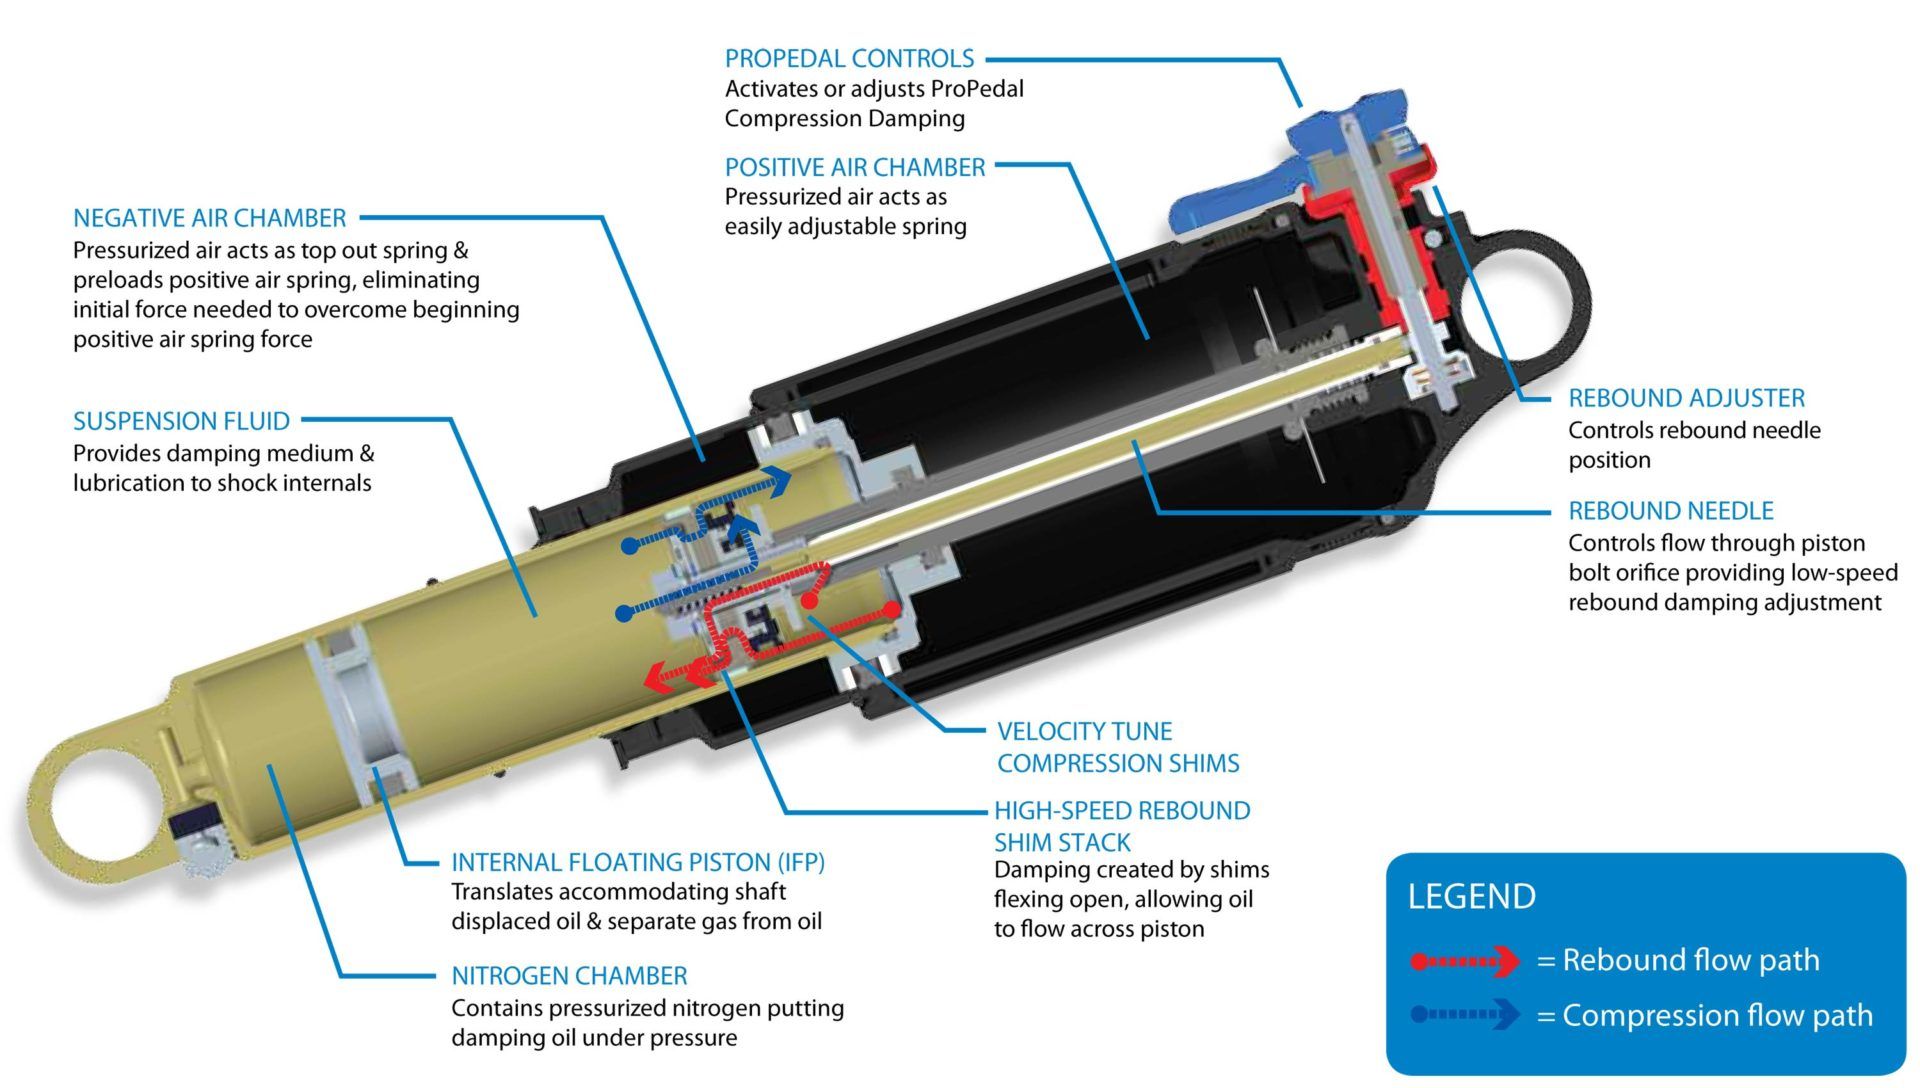
What is compression and rebound damping?
Compression damping is the intentional slowing of spring compression (hitting a bump) travel. Rebound damping is the intentional slowing of the spring expansion as it resumes to its natural state. Some motorcycles will have both high and low-speed adjustments to compression and rebound damping. Sport bikes and off-road motorcycles typically offer greater adjustability than entry level, or cruiser style motorcycles. High and low-speed damping refers to the speed of the suspension travel, rather than the speed of the motorcycle. High-speed damping affects suspension behaviour when hitting a sudden pothole on the street, or an individual rock on a trail. Low-speed damping affects behaviour such as braking related dive or cornering changes. (credit – Universal Technical Institute www.uit.edu)

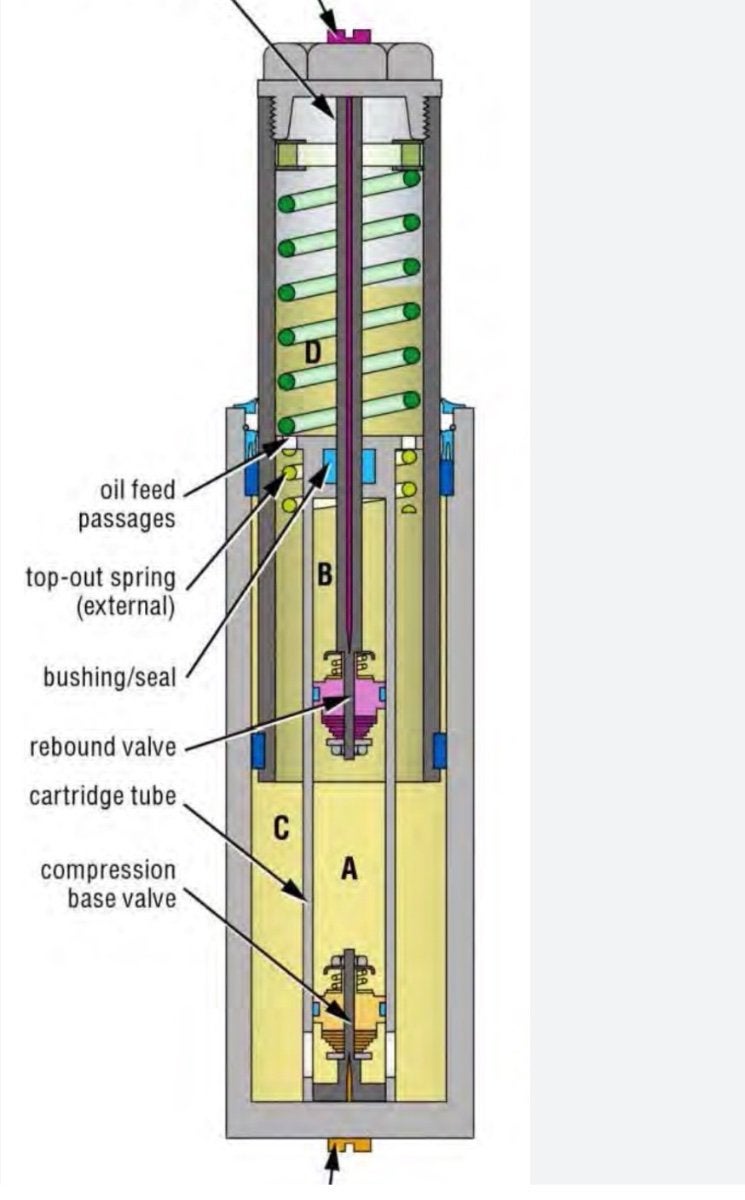
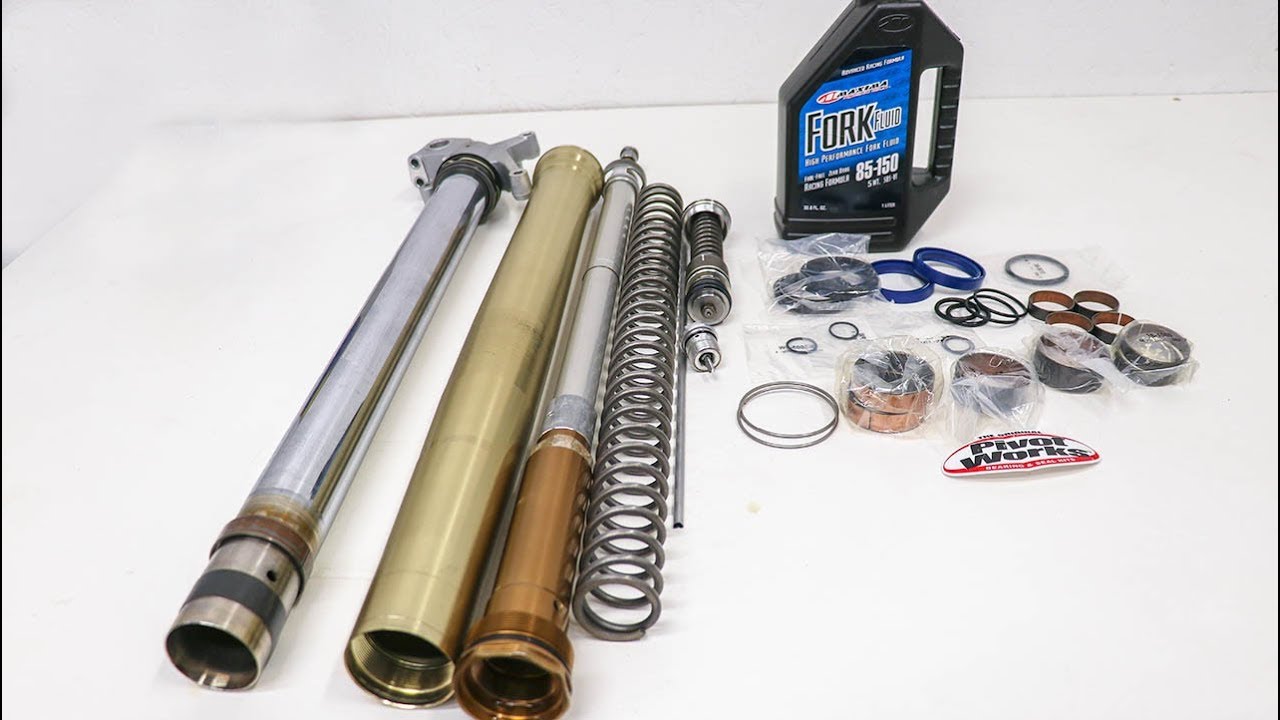
What are the primary differences between damper rods and cartridge forks?
Damper rod: Fluid travels through a fixed orifice to control the compression and rebound of the suspension. Damper rods are inexpensive to produce, but are limited in their effectiveness. Low speed damping is too soft and high-speed damping is too harsh.
Cartridge forks: Fluid travels through a set of stacked shims to control suspension movement. Shims bend and flex as the fluid travels past them. Cartridge forks are more tuneable, and offer better damping from low to high speed. They are more complicated and more expensive to produce. (credit – Universal Technical Institute www.uit.edu)


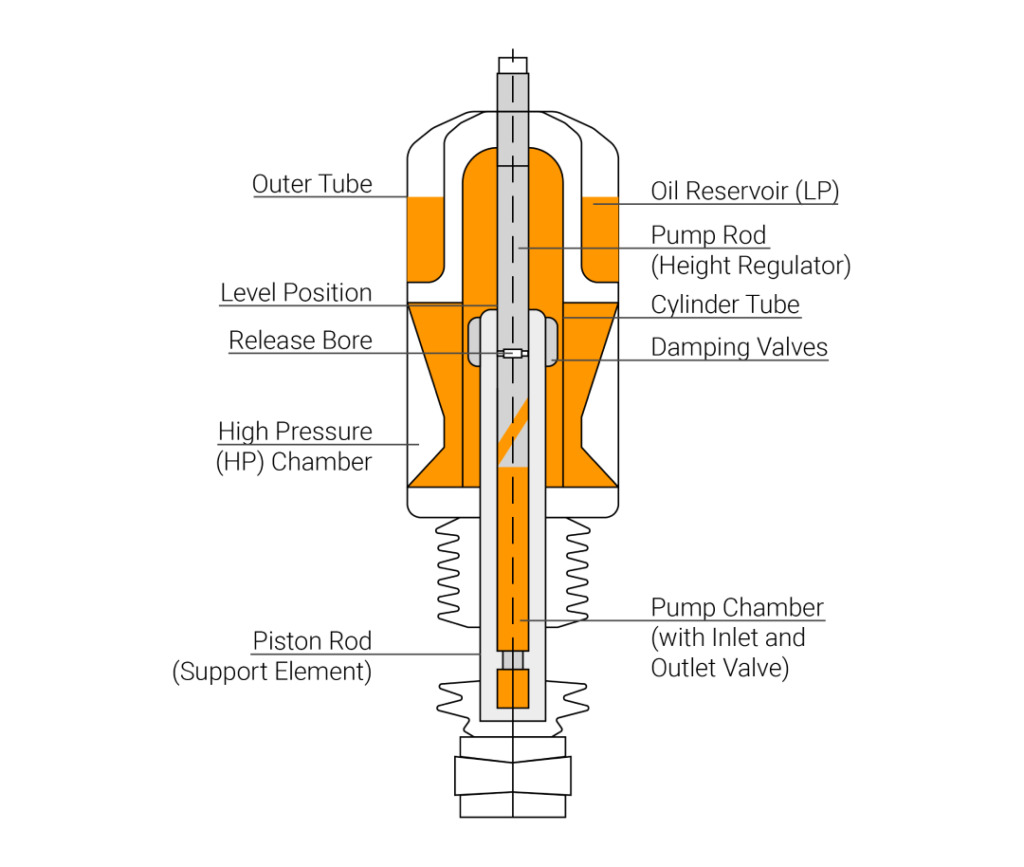
What is sag?
Motorcycle springs are always under tension, even when stationary. Vehicle weight causes compression at all times. Add a rider or two and luggage, and the suspension compresses even further. Sag is the percentage of suspension travel utilised while stationary. If the suspension sags too much when at rest, the bike may bottom out when encountering bumps once underway. Too little sag can cause a stiff, harsh ride. The difference between the fully extended length of the suspension and the length compressed by the weight of the motorcycle and rider is called “total sag” or “race sag”. (credit – Universal Technical Institute www.uit.edu)
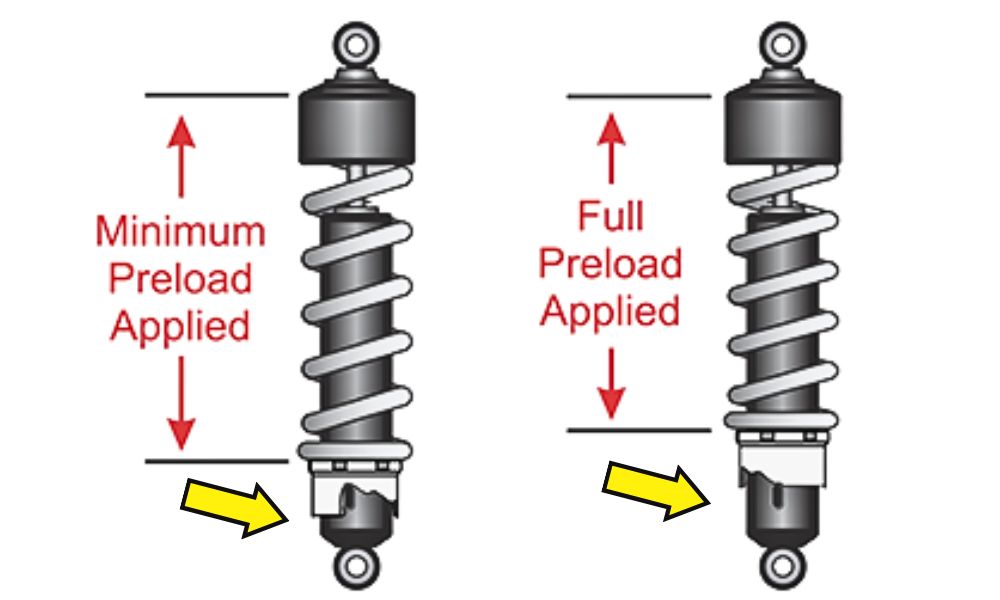
What is preload?
Some motorcycles offer suspension preload adjustability. Preload is the amount of tension on the springs when the bike is at rest. Increasing preload will decrease sag, and vice versa. Since a single motorcycle is often used for solo riding, riding with a passenger or riding with luggage, preload adjustment allows a degree of adaptability for multiple use cases. Although not recommended, adjusting preload can increase ground clearance for off road travel or decrease seat height for shorter riders. Some novice riders use preload as a ‘band-aid’ for overcoming incorrect spring stiffness relative to their height and weight. While not ideal, this is a common practice, as changing springs is expensive and labour intensive. By turning the bottom adjuster collar, more or less preload force is applied to the spring, while not changing the overall length of the spring. Increasing preload will result in less suspension sag once under rider load. (credit – Universal Technical Institute www.uit.edu)
A little quick hack from Séan
I have found the quickest and most inexpensive way to adjust, mostly lowering, the ride height of a bike is to change the suspension linkages, (where possible), and to drop the fork sliders through the triple clamps. This has no effect on the preload and sag and if done correctly has very little effect on the geometry of the bike. I lowered my wife’s Yamaha XT660R by 20 mm overall. Firstly, I stood the bike upright and taped a water level to the seat and marked where the bubble was. Then I had longer linkages made for the rear shock. Once installed I loosened the triple clamps and gently eased the sliders through until the bubble on the water level was on the same mark again to make sure the geometry was correct. Where before my wife could barely get one foot on the ground on tippy toes, she can now easily get the balls of both feet securely on the deck which has increased her riding confidence dramatically, especially off road.

What is ‘brake dive’?
Applying the brakes of a moving motorcycle increases the load borne by the front wheel and decreases the load borne by the rear wheel due to a phenomenon called load transfer. If the motorcycle is equipped with telescopic forks, the added load on the front wheel is transmitted through the forks, which compress. This shortening of the forks causes the front end of the bike to move lower, and this is called brake dive. Telescopic forks are particularly prone to this, unlike leading link designs. Brake dive can be disconcerting to the rider, who may feel like he or she is about to be thrown over the front of the motorcycle. If the bike dives so far as to bottom out the front forks, it can also cause handling and braking problems. One of the purposes of a suspension is to help maintain contact between the tyre and road. If the suspension has bottomed out, it is no longer moving as it should, and is no longer helping to maintain contact. Whilst excessive brake dive is disconcerting, and bottoming out can cause loss of traction, a certain amount of brake dive reduces the rake and trail of the motorcycle, allowing it to turn more easily. This is especially important to racers trail braking on entrance to corners. Brake dive with telescopic forks can be reduced by either increasing the spring rate of the fork springs, or increasing the compression damping of the forks. However, all of these changes make the motorcycle less pleasant to ride on rough roads, since the front end will feel stiffer. Go check out Wikipedia. You will be amazed at the different techniques and various technologies various manufacturers used to try to eliminate brake dive, we can’t go into all of it here as it would just take up too much space and time, but it is very interesting to have a read in your spare time.
What tasks are usually best left to the experts and trained professional suspension technicians?
- Changing springs for rider weight or intended riding style
- Replacing fork fluid, fork seals and fork bushings
- Valve and shim stack changes
- Suspension set up adjustments for rider
- Replacing damaged or worn out components
- Repairing or modifying suspension components

With a little bit of understanding and knowledge you can do the following yourself to suit your riding style and needs.
- Adjust the sag
- Adjust the preload
- Adjust the damping and compression rate
- Adjust the rebound rate.

But before we get into the why’s and how’s and what fors, we also need to know and understand that there are a multitude of different suspension systems for different types and models of bikes, check out your owner’s manual or google search your older bike if it no longer has an owner’s manual to find out what suspension it has. Here is a quick look at some of the suspension types out there, (scratched off the net from Wikipedia and other informative sites as well as some personal knowledge and asking some of the pro’s in the industry):
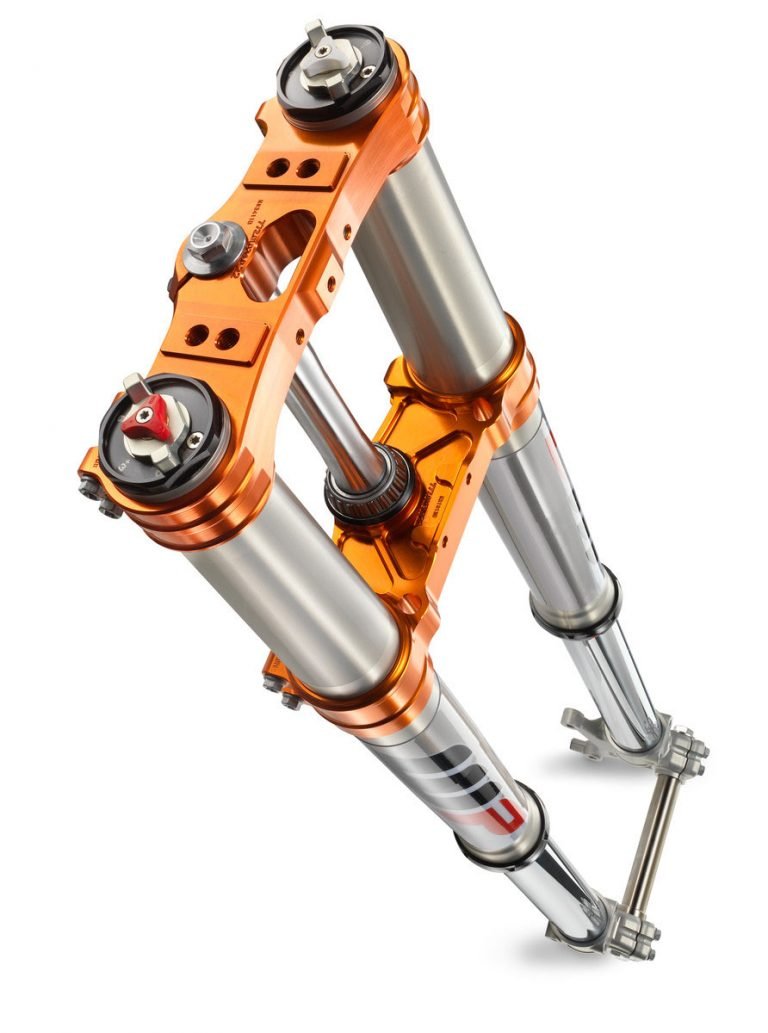
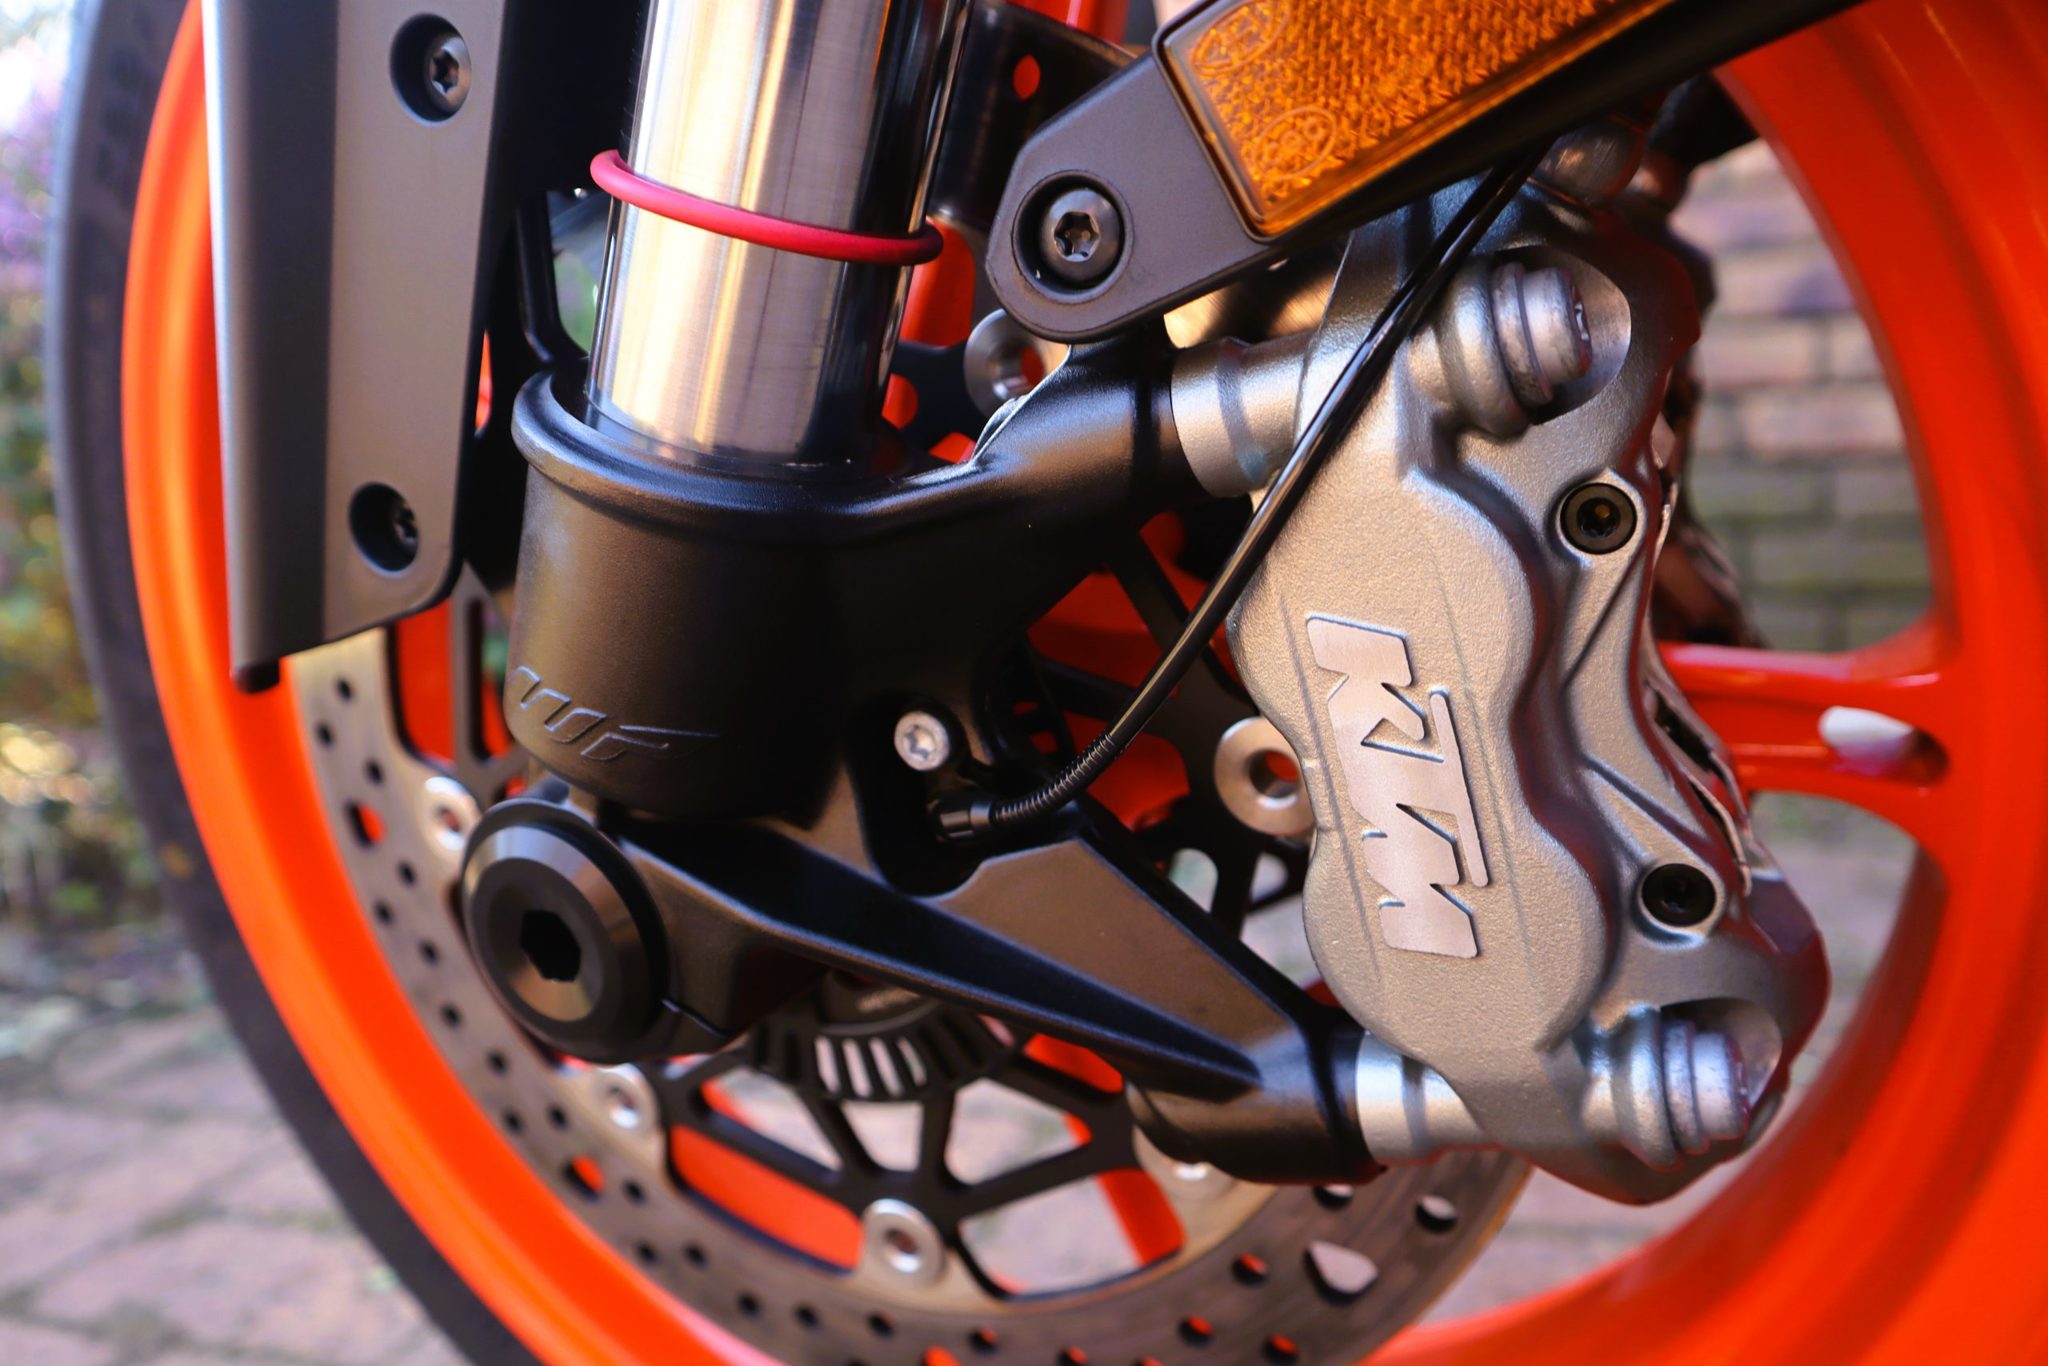
- The most common form of front suspension for a modern motorcycle is the telescopic fork.
- Upside-down” (USD) forks, also known as inverted forks, are installed inverted compared to conventional telescopic forks. The slider bodies are at the top, fixed in the triple clamps, and the stanchion tubes are at the bottom, fixed to the axle. This USD arrangement has two advantages: It decreases the unsprung weight of the motorcycle; and it increases torsional stiffness, which can improve handling. Two disadvantages of USD forks are they are more expensive than conventional telescopic forks; and they are liable to lose all their damping oil should an oil seal fail. USD forks are typically found on sport bikes and dirt bikes, though the Honda Valkyrie featured USD forks.
- Gas-charged cartridge forks, which became available in 2007, consist of gas-charged cartridges fitted within standard forks. This kit is suitable for super sport and dirt bike classes of racing, where regulations prohibit a complete fork replacement but allow modification of the original forks
- Other fork designs are girder forks, suspended on sprung parallel links, (not common since the 1940s)
- and bottom leading link designs, not common since the 1960s.
- Vincent Black Lightning with Girdraulic front suspension was a telescopic fork with a trailing linkage at the bottom attached to a form of shock absorber behind the fork and then attached to the bottom of the steering neck, early BMW’s used a similar system as well.
- Some manufacturers (e.g. Greeves) used a version of the swinging arm for front suspension on their motocross designs. A single-sided version of the idea is also used in scooters such as the Vespa.
- The hub-centre steering as developed by Ascanio Rodorigo, on a concept associated with Massimo Tamburini is a complex front swingarm alternative system that entails suspension and steering, as seen in projects such as Bimota Tesi and Vyrus motorcycles.
- Scott produced a motorcycle with telescopic forks in 1908 and would continue to use them until 1931
- In 1935 BMW became the first manufacturer to produce a motorcycle with hydraulically damped telescopic forks
- Most motorcycles today use telescopic forks for the front suspension.
- A lot of high end modern motorcycles these days have electronic, reactive suspensions with factory preset adjustments which are accessed and set by scrolling and selecting through the menu on the digital and/or TFT displays.
- A lot of the heavier BMW models use a tele-lever system upfront
- Dirt bikes use a range of either linkage or PDS systems, which we will look at the difference a little bit later.

Rear shock adjustment
Preload and sag
Firstly you need to look at your preload and sag settings, this will directly correlate to the weight of the rider and how the bike transfers weight under braking and acceleration directly affecting how the bike handles under braking and acceleration.
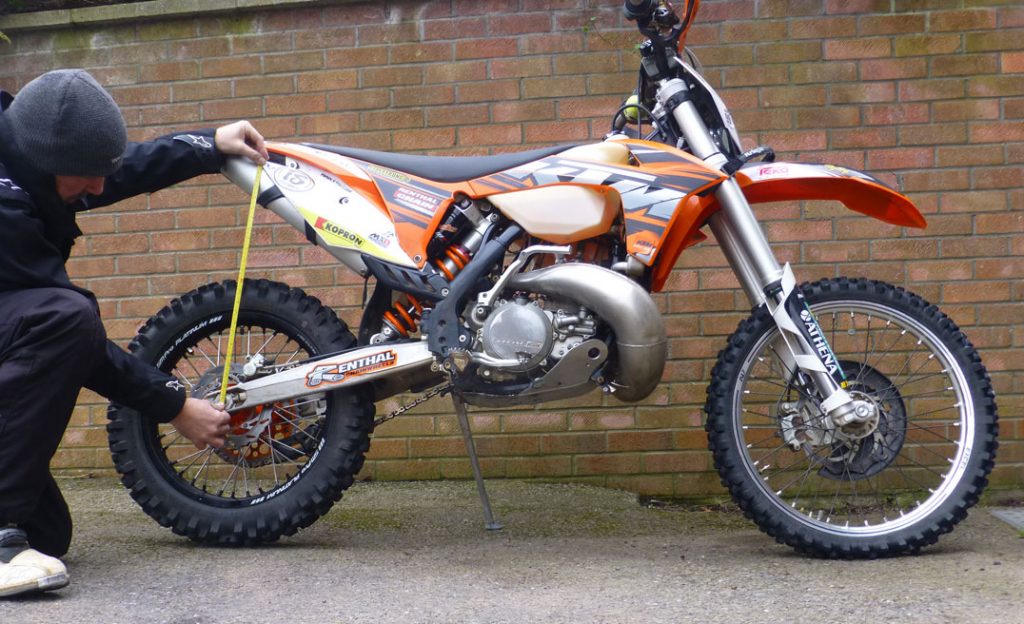
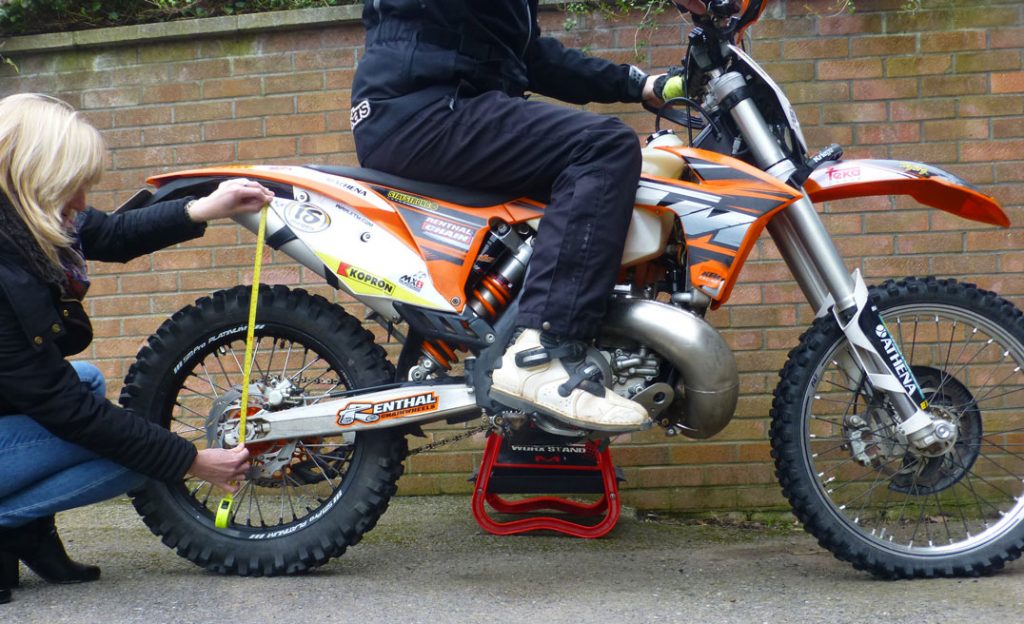
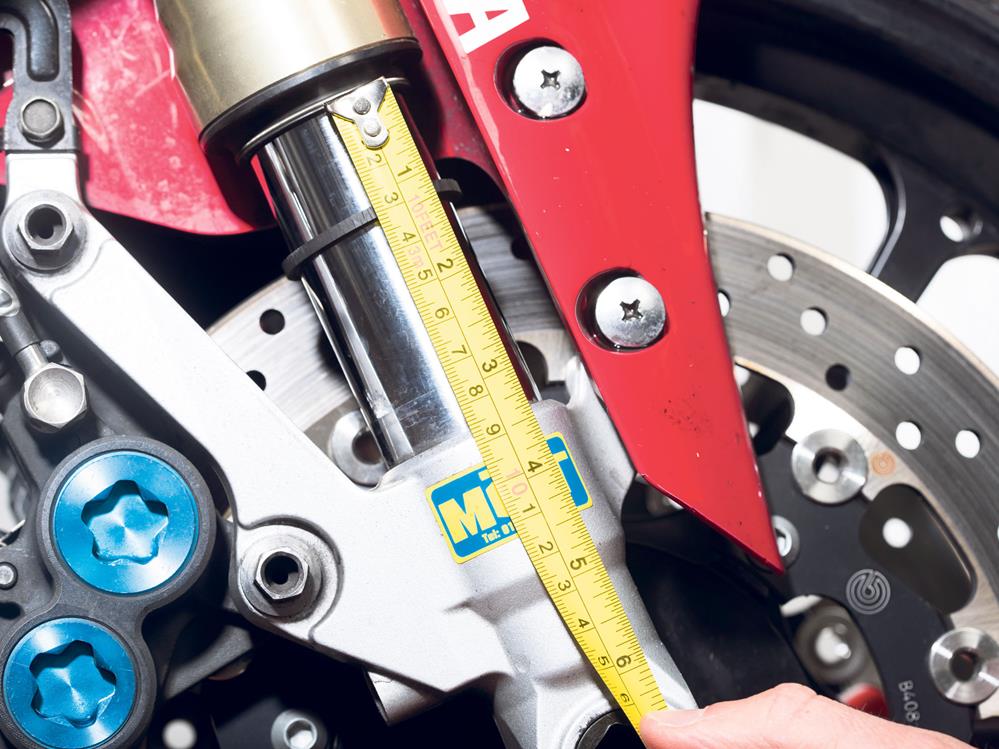
First determine what the optimal setting is for your bike’s suspension. Mark a common or reference point on the sub frame Then measure from the centre of the axle bolt to your reference point, using a standard tape measure, the extended or top out of the rear shock and spring by pulling it up to full extension. Then settle the bike back down and measure again, each time making a note of the measurement. Then get the rider in full kit and gear to sit on the bike with both feet on the pegs and measure again and make a note of the measurement. For better accuracy the rider should be standing on the pegs … obviously you will need somebody to hold the bike upright while you measure. Compare your measured range to that of the optimal settings for your suspension and adjust accordingly. On dirt bikes loosen the two aluminium lock nuts at the top of the rear shock spring, lengthen or soften the spring for lighter riders and shorten or stiffen the spring for heavier riders. On sport and road bikes you will find an adjuster on the side of the rear shock absorber, some you can feel a perceptible click and on other you just have to count the number of turns, all you need to remember is that clockwise is stiffening the preload and sag and counter clockwise is loosening it.
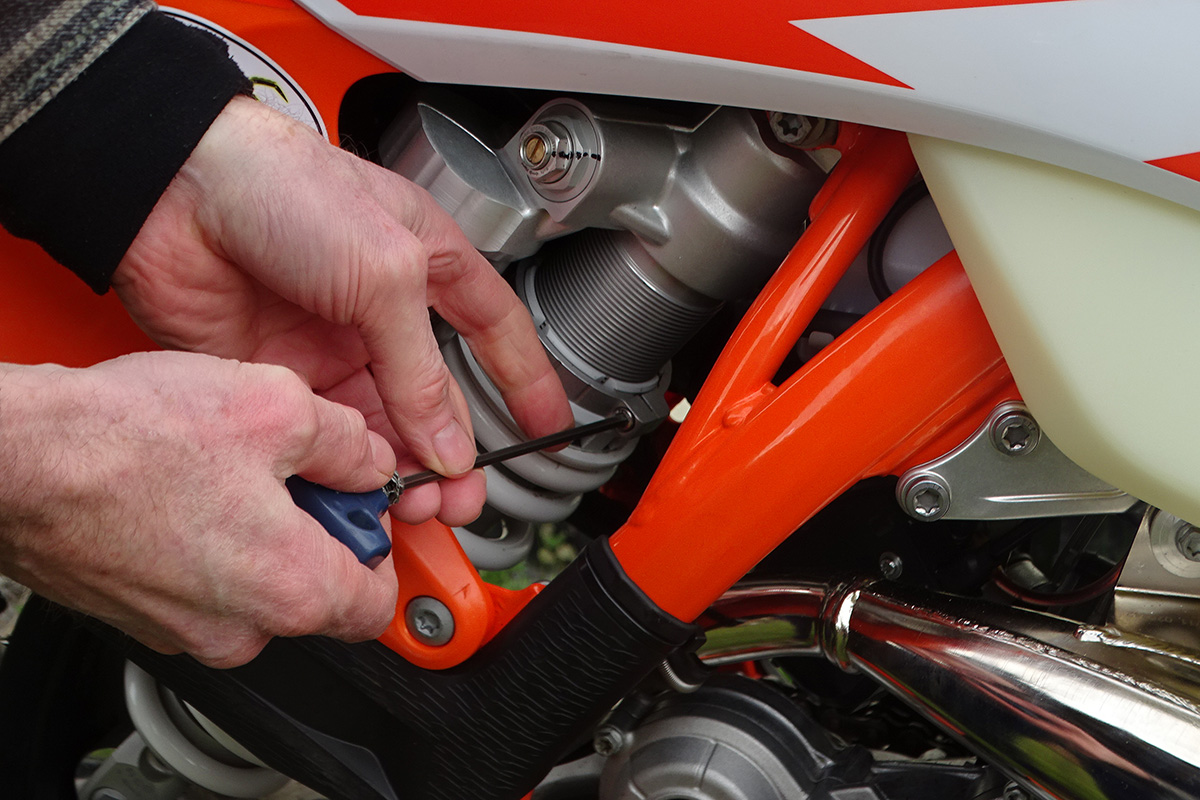
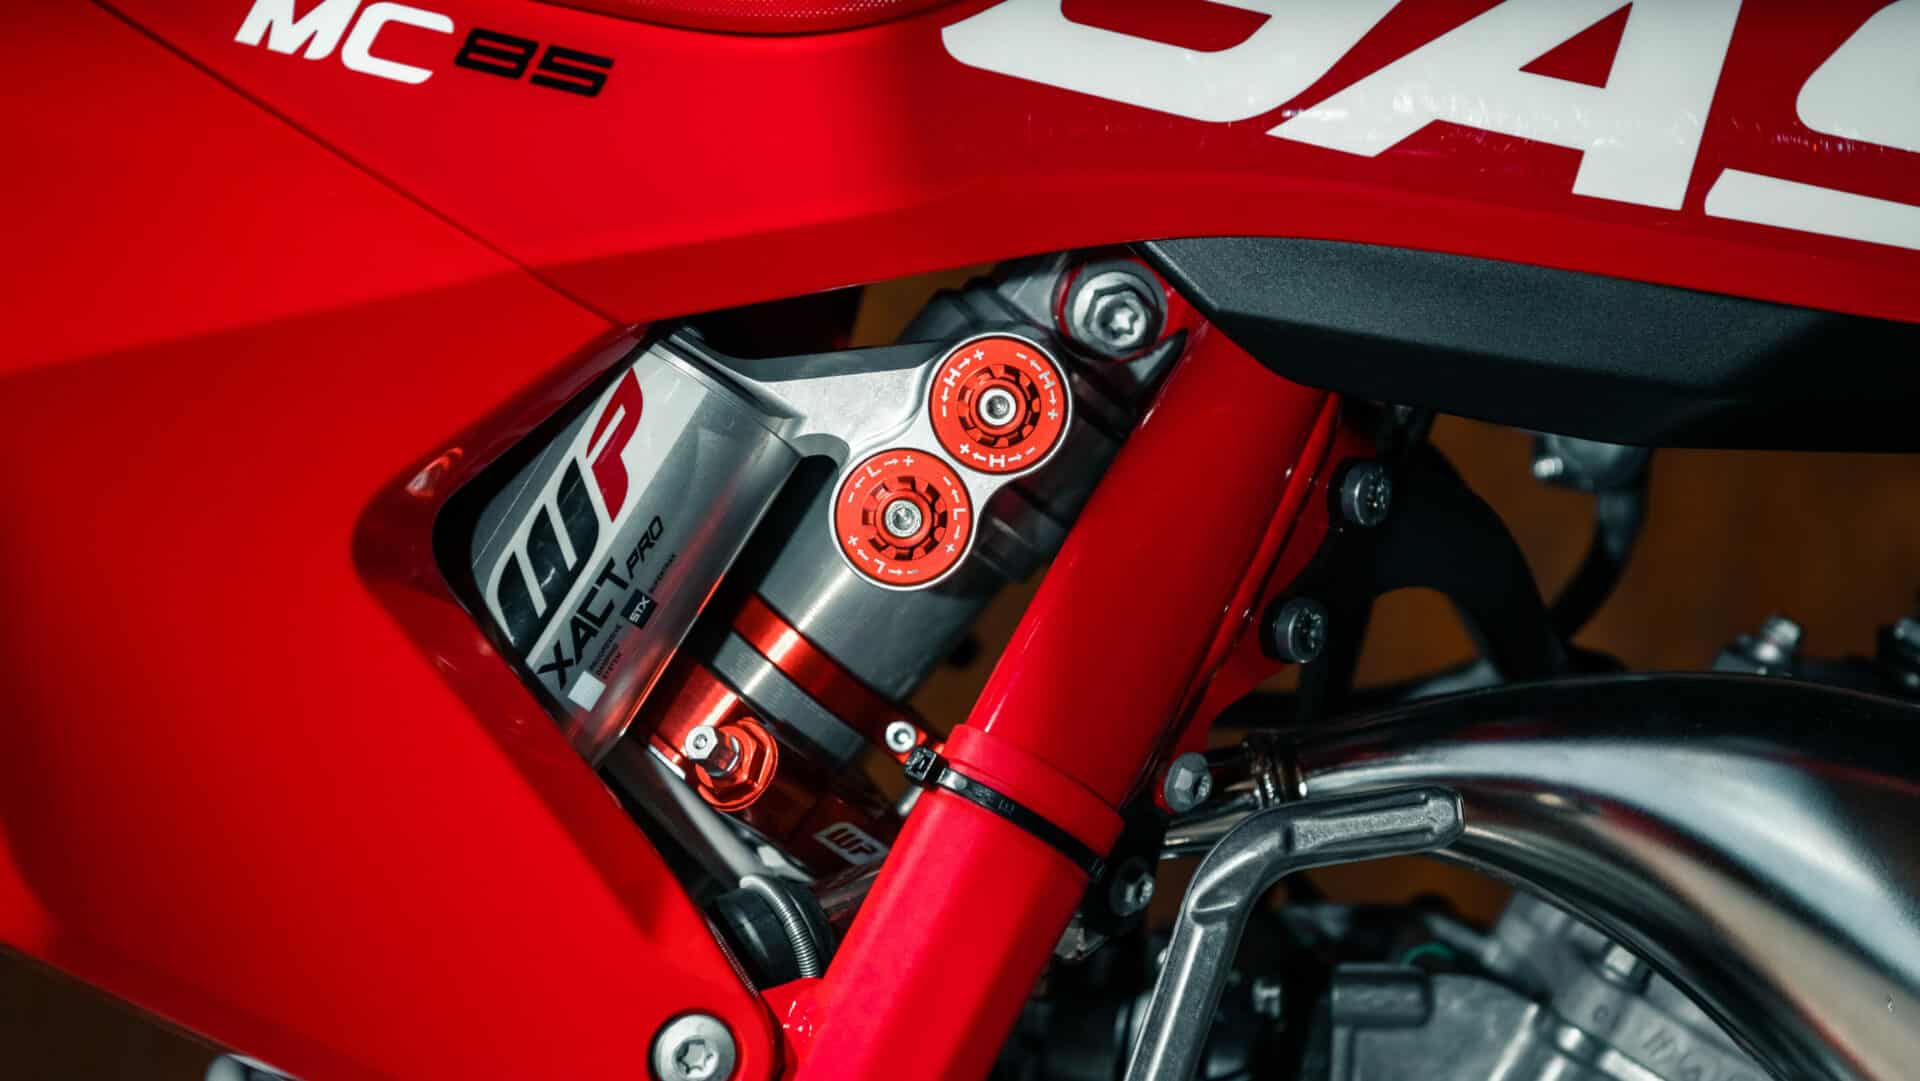
Rear shock damping
Damping is the speed at which the shock will compress under acceleration or over a bumpy surface or an obstacle. The adjuster is located at the top of the shock and can also be adjusted with a flat head screwdriver. The same rule applies here, anti clockwise adjustments make the damping softer, go too far and the rear shock gets soft, spongy and springy. Clockwise adjustments slow the shock down and increase the damping. Go too far and the rear shock starts to feel ineffective and heavy especially over very bumpy surfaces as it is not using the full length of its travel and the same is true of the rebound setting. Also, always remember that adjusting either the rebound or damping will have an effect on the other. The trick is to find the optimal balance between rebound and damping for your weight and riding style.
If you have found that sweet spot, that perfect balance between rebound, damping, preload and sag and your shock is still bottoming out then you may need to consider a heavier or sturdier rear spring or you might need to have your rear shock refurbished by a professional suspension technician, that or spend more time doing cardio and less time in front of the telly chewing on hamburgers.


Front suspension
Due to the large variety of different front suspension systems we are going to focus on the cartridge type which most modern bikes seem to be fitted with these days.
Firstly lets look at some terminology and understand what it refers to:
Compression: This is the speed of the downward stroke of the fork under braking or tilting into a corner
Rebound: Conversely this is the speed of the upward stroke of the fork once released from the pressure of whatever caused the compression.
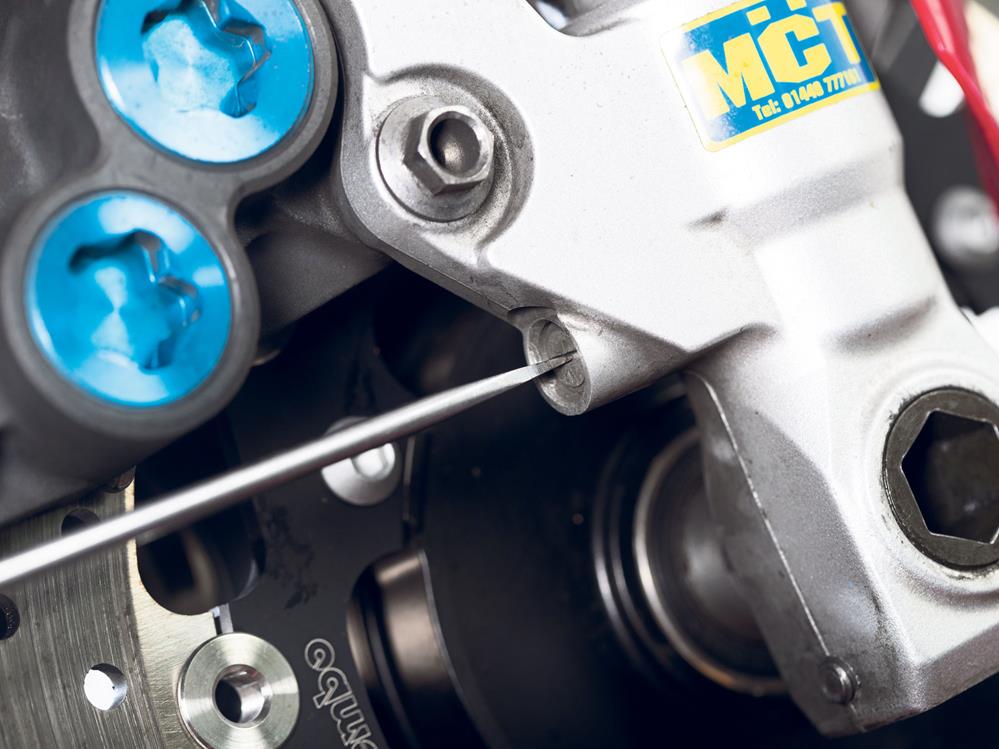
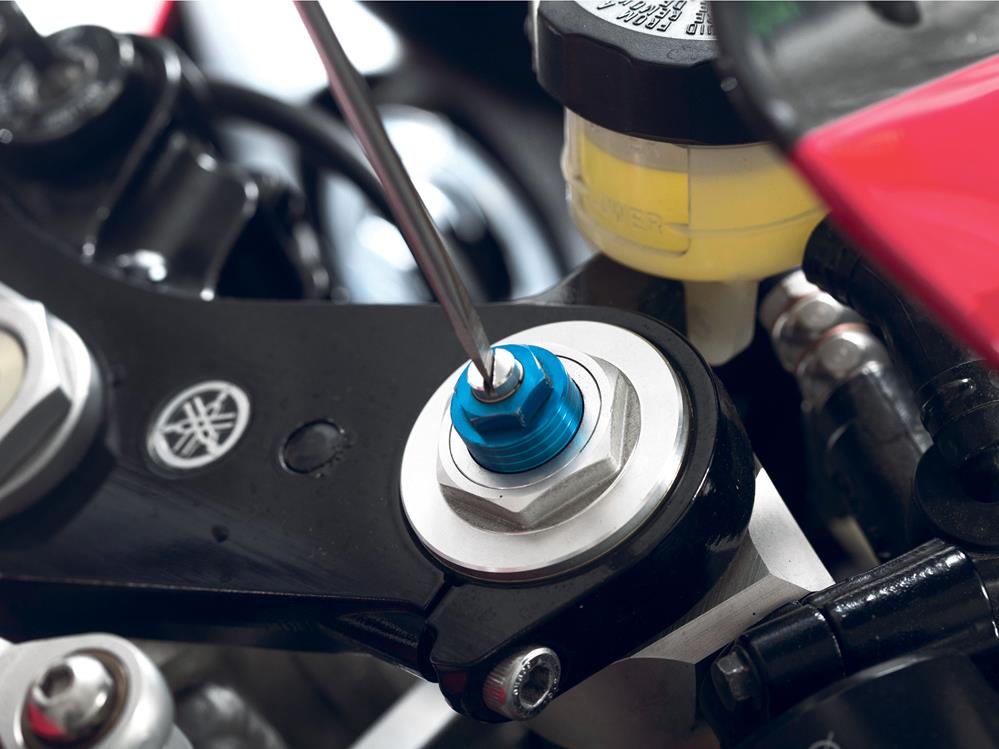
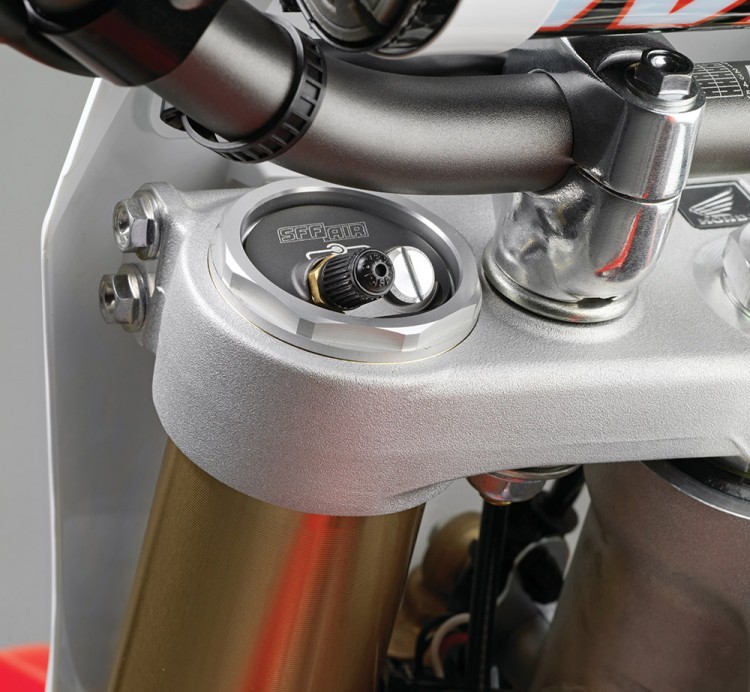
The compression setting adjusters are located at the top of the fork, on a dirt bike a flat head screwdriver can be used and on a road bike or superbike a socket or wrench needs to be used, some of the premium new models these days are fitted with quick-adjusters that can easily be turned by hand. On dirt bikes you will also find an air bleed release above or below the compression adjuster. in a lot of instances the rebound adjuster is located at the bottom of the fork.
Adjusting the fork compression and rebound ratio or speed
Turning the adjuster in or clockwise closes down the valve and restricts the oil flow thus slowing down the speed of the compression or downward stroke of the fork, essentially stiffening it up. Counter clockwise opens up the valve allowing the oil to flow more freely and speeding up the stroke or making it softer. The same applies to the rebound, the force and speed at which the fork returns to its natural position. Clockwise slows it down and anti-clockwise speeds it up.

How to determine when, why and how you need to adjust your forks.
Firstly, don’t be scared of large incremental adjustments. As long as you stay within the working parameters of the adjusters you cannot damage them. Do not try to force or over tighten or over loosen them and you won’t inflict any damage and going back to factory settings or your start settings is as easy as referring to your notes or your owner’s manual or even google.
The easiest way to determine which way to set your suspension, especially the damping is by putting a rubber band or zip tie around the bottom of your fork leg then going out for a ride and giving it horns for about 10 to 15 minutes. Stop, check where the zip tie has been moved to, ideally you want to use around 90 percent of your full suspension travel. If the zip tie is more than 25 percent up from the bottom of the fork, your compression is possibly set too hard and you can afford to soften it up a bit to use more range of the stroke. Sometimes you can have your setting so soft that it feels stiff using up too much of the stroke too quickly, bottoming out the fork that it ramps up and feels harsh. A quick way to identify this problem is that your bike will feel very twitchy under braking as the front end is loaded with too much weight. (remember the weight transfer mentioned earlier?)
Rebound is more of a feeling than a firm setting. Too slow and hard will initially make your bike feel more planted in a corner, over an obstacle or under braking, but will start to feel harsh, hard and heavy as the bumps come more quickly without the fork releasing far or quick enough to its full extension packing it down hard and reducing its shock absorption abilities by keeping it at the bottom of its stroke thus negating both the compression and rebound. If the rebound is set too quickly or too softly the bike will become nervous and unstable with a bouncy or springy feel on the front end. Going into corners your bike will feel loose and wobbly, not wanting to settle because the fork is releasing or rebounding too quickly and with too much force and thus you need to slow it down a bit. As mentioned, rebound is more of a feeling so you need to get out and ride your bike and make adjustments, always keep notes of what you did and what the result was. Not only will it help you remember what you did and the effect it had, but it will also help you understand your bike better and improve your riding skills.

Finally, and mostly on dirt bikes you will find an air bleeder on top of the fork above or below your comprehension adjuster. Temperature change from friction of movement or atmospheric conditions can increase the pressure in the outer cartridge by 1 or 2 PSI during the course of a ride. This may not sound like a lot but as the fork is compressed it shrinks the volume of space and increases the pressure. This will result in the forks feeling harder during the course of a ride and will get harsher as the day wears on. By turning the bleed screw counter clockwise with a flat head screwdriver until it is open which will reduce the pressure back to zero PSI and return the forks back to normal operation. This is so effective that some riders have replaced the screw with quick release or easy bleeders for convenience sake during a ride.
So! There you have the basics of how your bike’s suspension works and how it affects your riding. We have had to leave out a bunch of finer details about suspension basically because of space and most of it is just ‘nice to know’ stuff which can easily be googled or found out with a little trip down to your local dealer or chat to any one of our advertisers.